Update Sandbox Studio
Updating Made Simple
Updating Sandbox Studio is easier than ever. The update process uses the same installation script you used for the initial setup, making it straightforward and familiar.
How It Works
When you run the installation script on a environment with an existing Sandbox Studio installation, the script automatically:
- Detects the previous installation
- Gathers all required configuration information from your current setup
- Presents a summary of what will be updated
- Asks for confirmation before proceeding
Running the wizard
- Login to your AWS Organisation Management account.
- Open a new CloudShell console (a link to open CloudShell can be found in the bottom left corner of the AWS console).
- Ensure you are in the region where you want to install Sandbox Studio.
- Run the following command:
bash <(curl -s https://dist.sandboxstudiosoftware.com/install.sh)- The following should display:

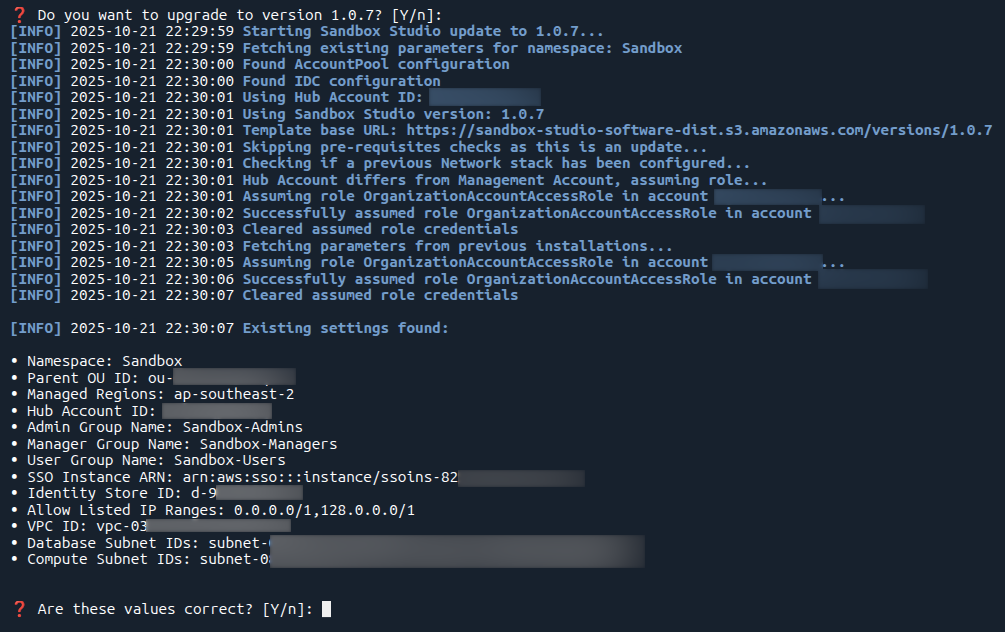
Confirm existing values
The script will display your current installation details and the updates available. Review this information carefully to ensure everything is correct.
Select Stacks to Update
You'll be presented with a stack-by-stack selection interface. For each stack, you can choose whether to update it or skip it.
Best Practice: It is highly recommended to update all stacks to ensure compatibility and access to the latest features and security patches.

Note: During update process, the script does not modify your existing configuration (AppConfig), your Identity Center applications, or anything else than the CloudFormation stacks for Sandbox Studio. You can force a reinstall of the solution by adding the flag --reinstall true to the installation script
Support
If you encounter any issues during the update process, please contact your Sandbox Studio support team at support@sandboxstudiosoftware.com or go to https://support.sandboxstudiosoftware.com
No comments to display
No comments to display