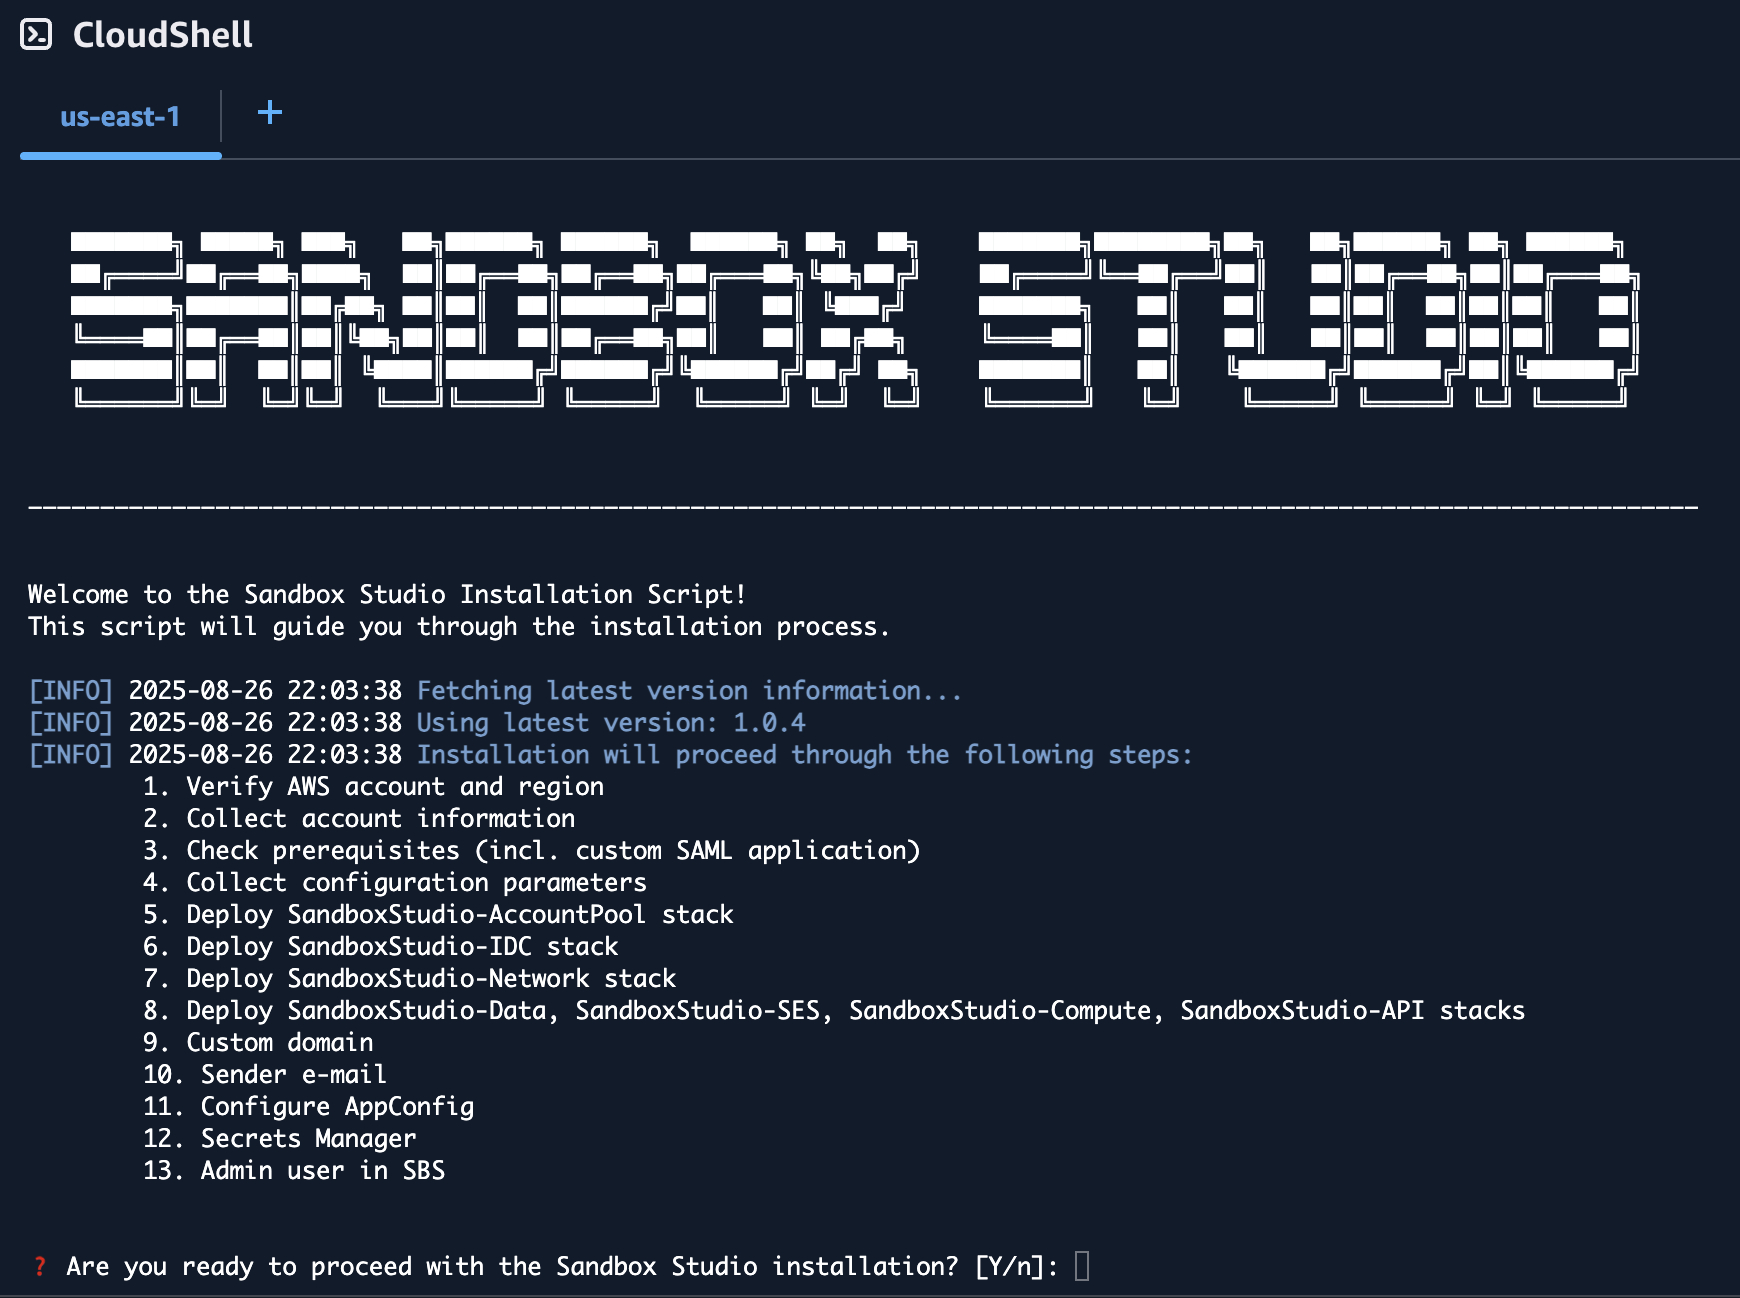
# Deploy the Solution Manually

**Note: We strongly recommend using the installation script available** [**here**](https://docs.sandboxstudiosoftware.com/books/installation-guide/page/running-the-installation-wizard) **to deploy the Sandbox Studio.**

# Before you start...

<p class="callout danger">Before you embark on this manual AWS CloudFormation adventure, let us remind you that we've poured countless hours (and several pots of coffee) into creating a beautiful, automated deployment wizard that handles all the CloudFormation templates, Identity Center custom SAML application setup, and custom application configurations for you. It's tested, reliable, and significantly less likely to result in you going back and forth between the AWS console, CloudFormation stacks, and custom application logs at 2 AM trying to figure out why your deployment failed. If you're here because you enjoy the thrill of manually configuring SAML attributes, debugging CloudFormation syntax errors, and the unique satisfaction of troubleshooting custom application integrations that could have been automated entirely, then welcome—you're in the right place!  
  
**But seriously, unless you have a very specific reason for going manual, please consider using our automated script. Your future self will thank you, and so will our support team.**</p>

<p class="callout info">**[Click here to see how to run the Installation Wizard instead](https://docs.sandboxstudiosoftware.com/books/installation-guide/page/running-the-installation-wizard "Running the Installation Wizard")**</p>

[![image.png](https://docs.sandboxstudiosoftware.com/uploads/images/gallery/2025-08/scaled-1680-/P7gimage.png)](https://docs.sandboxstudiosoftware.com/uploads/images/gallery/2025-08/P7gimage.png)

# Overview of what you'll do

Installing Sandbox Studio manually follows three main stages. Each stage builds on the last, so it’s important to work through them in order.

---

#### 1. Confirm Prerequisites

Before beginning the installation, you should confirm that your organisation meets all prerequisites.

Sandbox Studio relies on several AWS services and features being enabled in advance, including:

- **AWS Organisations** with all features enabled
- **Service Control Policies (SCPs)** for account guardrails
- **AWS Resource Access Manager (RAM)** for resource sharing
- **CloudFormation StackSets trusted access**
- **AWS Cost Explorer** for spend tracking
- **IAM Identity Center (IdC)** for centralised access control
- **AWS Service Quotas** (e.g. Lambda concurrency, CodeBuild quotas)

For a full checklist of requirements, please see the **[Installation Prerequisites](https://docs.sandboxstudiosoftware.com/books/installation-guide/page/installation-prerequisites "Installation Prerequisites")**.

You will also need to collect configuration values in advance, such as:

- AWS Region
- Organisation and OU IDs
- IAM Identity Center group names
- IP allow-list ranges

---

#### 2. Deploy the CloudFormation Stacks

Next, you will deploy the Sandbox Studio CloudFormation templates. Each stack must be launched in the correct AWS account and in a specific order.

- **Organisation Management account**
    
    
    - [Account Pool stack](https://docs.sandboxstudiosoftware.com/books/installation-guide/page/step-1-deploy-the-accountpool-stack "Step 1: Deploy the AccountPool stack")
    - [IDC stack](https://docs.sandboxstudiosoftware.com/books/installation-guide/page/step-2-deploy-the-idc-stack "Step 2: Deploy the IDC stack")
- **Hub account**
    
    
    - [Network stack](https://docs.sandboxstudiosoftware.com/books/installation-guide/page/step-3-deploy-the-network-stack "Step 3: Deploy the Network stack")
    - [Data stack](https://docs.sandboxstudiosoftware.com/books/installation-guide/page/step-4-deploy-the-data-stack "Step 4: Deploy the Data stack")
    - [SES stack](https://docs.sandboxstudiosoftware.com/books/installation-guide/page/step-5-deploy-the-ses-stack "Step 5: Deploy the SES stack")
    - [Compute stack](https://docs.sandboxstudiosoftware.com/books/installation-guide/page/step-5-deploy-the-compute-stack "Step 6: Deploy the Compute stack")
    - [API stack](https://docs.sandboxstudiosoftware.com/books/installation-guide/page/step-6-deploy-the-api-stack "Step 7: Deploy the API stack")

Each stack depends on outputs from earlier stacks. The next page, **[Deploying the Stacks](https://docs.sandboxstudiosoftware.com/books/installation-guide/page/aws-cloudformation-templates "AWS CloudFormation templates")** provides the exact order and details.

---

#### 3. Complete Post-Deployment Steps

Once the stacks are deployed successfully, you’ll need to carry out some manual configuration tasks. These ensure Sandbox Studio integrates with your organisation’s identity provider, DNS, and and your application settings are in sync with your environment.

At a high level, you will:

1. **Set up a SAML 2.0 application** in IAM Identity Center, and assign Sandbox Studio groups to it.
2. **Configure DNS (optional)** for a custom domain, and update the application ACS URL.
3. **Update AWS AppConfig settings** (IdP URLs, audience, web app URL, access portal, email “from” address).
4. **Store the IdP certificate** in AWS Secrets Manager (the API stack provides the secret ARN).
5. **Add initial administrators** to the Sandbox Studio Admin group in IAM Identity Center.

Each of these steps is explained in detail in the [**Post-Deployment Configuration**](https://docs.sandboxstudiosoftware.com/books/installation-guide/chapter/post-deployment-configuration-tasks "Post-deployment configuration tasks") section.

# AWS CloudFormation templates

Sandbox Studio is packaged as a set of AWS CloudFormation stacks. If you decide to manually install Sandbox Studio, you must deploy them **in the order shown below** and **into specific AWS accounts**. This page explains each stack, where to deploy it, and why the order matters.

---

#### Stack Summary

<table border="1" id="bkmrk-%23-stack-what-it-does" style="border-collapse: collapse; width: 100%;"><colgroup><col style="width: 4.76758%;"></col><col style="width: 14.6603%;"></col><col style="width: 35.0417%;"></col><col style="width: 16.6914%;"></col><col style="width: 18.9463%;"></col><col style="width: 10.0119%;"></col></colgroup><thead><tr><td class="align-center">**\#**</td><td>**Stack**</td><td>**What it does**</td><td>**Deploy to**</td><td>**Key AWS Services**</td><td>**Depends on**</td></tr></thead><tbody><tr><td class="align-center">1</td><td>Account Pool</td><td>Creates OUs to host sandbox accounts and applies SCPs to govern them.</td><td>Org Management Account</td><td>AWS Organisational Units (OU's), Service Control Policies (SCP's)</td><td>-</td></tr><tr><td class="align-center">2</td><td>IDC</td><td>Sets up IAM Identity Center groups used by Sandbox Studio users.</td><td>Org Management Account</td><td>IAM Identity Center Groups</td><td>-</td></tr><tr><td class="align-center">3</td><td>Network</td><td>Provisions a VPC with multiple subnets. Hosts the database in a private subnet and runs Lambda functions in private subnets with egress access.</td><td>Hub Account</td><td>Amazon VPC, VPC Endpoints</td><td>  
</td></tr><tr><td class="align-center">4</td><td>Data</td><td>Deploys the application database that stores all Sandbox Studio data. Kept separate to simplify upgrades.</td><td>Hub Account</td><td>Amazon RDS</td><td>Network</td></tr><tr><td class="align-center">5</td><td>SES</td><td>Creates email templates for alerts and notifications.</td><td>Hub Account</td><td>Amazon SES</td><td>-</td></tr><tr><td class="align-center">6</td><td>Compute</td><td>Core back end components such as event driven Step Functions and CodeBuild tasks that are used to clean up and set up new accounts.</td><td>Hub Account</td><td>Event Bridge, Lambda, Step Functions, CodeBuild</td><td>Data, Network, SES</td></tr><tr><td class="align-center">7</td><td>API</td><td>The front end compute stack including the API and user facing web application.</td><td>Hub Account</td><td>Lambda, API Gateway, S3, CloudFront</td><td>Compute</td></tr></tbody></table>

---

#### Where to get the CloudFormation templates

**All templates are published to S3**. Choose the version you want and construct URLs as:

<div class="contain-inline-size rounded-2xl relative bg-token-sidebar-surface-primary" id="bkmrk-https%3A%2F%2Fsandbox-stud"><div class="overflow-y-auto p-4" dir="ltr">`https://sandbox-studio-software-dist.s3.amazonaws.com/versions/<<span class="hljs-keyword">VERSION</span>>/<STACK_NAME>.<span class="hljs-keyword">template</span>.json`</div></div>The stack names (filenames) are shown below:

- `SandboxStudio-AccountPool.template.json`
- `SandboxStudio-IDC.template.json`
- `SandboxStudio-Network.template.json`
- `SandboxStudio-Data.template.json`
- `SandboxStudio-SES.template.json`
- `SandboxStudio-Compute.template.json`
- `SandboxStudio-API.template.json`

**Find the latest version** (optional): fetch  
`https://dist.sandboxstudiosoftware.com/latest.json`  
and use its `"version"` value in place of `<VERSION>`.

<p class="callout info">Example: if `latest.json` says `{"version":"1.2.3"}`, the AccountPool template is  
`https://sandbox-studio-software-dist.s3.amazonaws.com/versions/1.2.3/SandboxStudio-AccountPool.template.json`.</p>

# Step 1: Deploy the AccountPool stack

Install the AccountPool CloudFormation stack in the organisation management account.

#### How to Install this Stack

1. Login to the AWS Management Console using the **Organisation Management Account.**
2. Navigate to the **CloudFormation** page.
3. Click **Create Stack** and select **With new resources (standard)**.
4. For Template Source, select **Amazon S3 URL** and enter the CloudFormation Template URL shown below and click **Next**.
5. On the **Specify Stack** page, enter the stack name '**SandboxStudio-AccountPool**' and use the parameters shown below.

---

#### CloudFormation Template URL

```
https://sandbox-studio-software-dist.s3.amazonaws.com/versions/<VERSION>/SandboxStudio-AccountPool.template.json
```

For more information on how to find the latest version, [click here](https://docs.sandboxstudiosoftware.com/books/installation-guide/page/aws-cloudformation-templates "AWS CloudFormation templates").

---

#### Parameters

<div class="_tableContainer_sk2ct_1" id="bkmrk-key-what-to-enter-na"><div class="_tableWrapper_sk2ct_13 group flex w-fit flex-col-reverse" tabindex="-1"><table class="w-fit min-w-(--thread-content-width)" data-end="5123" data-start="4515" style="width: 115.595%; height: 148.984px;"><thead data-end="4616" data-start="4515"><tr data-end="4616" data-start="4515" style="height: 29.7969px;"><th data-col-size="sm" data-end="4535" data-start="4515" style="width: 23.3945%; height: 29.7969px;">**Key**</th><th data-col-size="md" data-end="4616" data-start="4535" style="width: 76.6055%; height: 29.7969px;">**What to enter**</th></tr></thead><tbody data-end="5123" data-start="4719"><tr data-end="4820" data-start="4719" style="height: 29.7969px;"><td data-col-size="sm" data-end="4739" data-start="4719" style="width: 23.3945%; height: 29.7969px;">**Namespace**</td><td data-col-size="md" data-end="4820" data-start="4739" style="width: 76.6055%; height: 29.7969px;">3–8 chars, e.g. `MySs`</td></tr><tr data-end="4922" data-start="4821" style="height: 29.7969px;"><td data-col-size="sm" data-end="4841" data-start="4821" style="width: 23.3945%; height: 29.7969px;">**HubAccountId**</td><td data-col-size="md" data-end="4922" data-start="4841" style="width: 76.6055%; height: 29.7969px;">12‑digit Hub account ID</td></tr><tr data-end="5023" data-start="4923" style="height: 29.7969px;"><td data-col-size="sm" data-end="4943" data-start="4923" style="width: 23.3945%; height: 29.7969px;">**ParentOuId**</td><td data-col-size="md" data-end="5023" data-start="4943" style="width: 76.6055%; height: 29.7969px;">OU ID to nest Sandbox OUs under (e.g. your **root ID** `r-xxxx` or a specific OU ID e.g. `o-xxxx`)</td></tr><tr data-end="5123" data-start="5024" style="height: 29.7969px;"><td data-col-size="sm" data-end="5047" data-start="5024" style="width: 23.3945%; height: 29.7969px;">**SsManagedRegions**</td><td data-col-size="md" data-end="5123" data-start="5047" style="width: 76.6055%; height: 29.7969px;">Comma separated list of regions managed by Sandbox Studio, e.g. `eu-west-2,us-east-1`</td></tr></tbody></table>

</div></div>---

#### About this Stack

**Purpose**

- Creates multiple **Organisational Units (OUs)** to contain all sandbox accounts.
- Applies **Service Control Policies (SCPs)** to those OUs to enforce guardrails.

**Where to deploy**

- **Organisation management account** only. Creating OUs and attaching SCPs requires management‑account permissions.

**What it creates**

- OU structure under your AWS Organisation or specific existing OU that you specify.
- A set of SCPs applied to the OU(s).

**Validation checks**

- New OUs are visible in **AWS Organisations**.
- SCPs are attached to the target OUs and show as **Active**.

**Tips**

- Review isntalled SCPs and enhance or relax as needed to suit your organisation's security requirements.

<div _ngcontent-ng-c3818350049="" class="markdown markdown-main-panel enable-updated-hr-color" dir="ltr" id="bkmrk--3"></div>

# Step 2: Deploy the IDC stack

Install the IDC CloudFormation stack in the organisation management account.

#### How to Install this Stack

1. Login to the AWS Management Console using the **Organisation Management Account.**
2. Navigate to the **CloudFormation** page.
3. Click **Create Stack** and select **With new resources (standard)**.
4. For Template Source, select **Amazon S3 URL** and enter the CloudFormation Template URL shown below and click **Next**.
5. On the **Specify Stack** page, enter the stack name '**SandboxStudio-IDC**' and use the parameters shown below.

---

#### CloudFormation Template URL

```
https://sandbox-studio-software-dist.s3.amazonaws.com/versions/<VERSION>/SandboxStudio-IDC.template.json
```

For more information on how to find the latest version, [click here](https://docs.sandboxstudiosoftware.com/books/installation-guide/page/aws-cloudformation-templates "AWS CloudFormation templates").

---

#### Parameters

<div class="_tableContainer_sk2ct_1" id="bkmrk-key-what-to-enter-na"><div class="_tableWrapper_sk2ct_13 group flex w-fit flex-col-reverse" tabindex="-1"><table class="w-fit min-w-(--thread-content-width)" data-end="6285" data-start="5393" style="width: 119.167%;"><thead data-end="5491" data-start="5393"><tr data-end="5491" data-start="5393"><th class="align-left" data-col-size="sm" data-end="5414" data-start="5393" style="width: 37.3063%;">**Key**</th><th class="align-left" data-col-size="sm" data-end="5491" data-start="5414" style="width: 62.6937%;">**What to enter**</th></tr></thead><tbody data-end="6285" data-start="5591"><tr data-end="5689" data-start="5591"><td data-col-size="sm" data-end="5612" data-start="5591" style="width: 37.3063%;">**Namespace**</td><td data-col-size="sm" data-end="5689" data-start="5612" style="width: 62.6937%;">Use the same namespace you used in step 1.</td></tr><tr data-end="5788" data-start="5690"><td data-col-size="sm" data-end="5711" data-start="5690" style="width: 37.3063%;">**HubAccountId**</td><td data-col-size="sm" data-end="5788" data-start="5711" style="width: 62.6937%;">12‑digit Hub account ID</td></tr><tr data-end="5888" data-start="5789"><td data-col-size="sm" data-end="5810" data-start="5789" style="width: 37.3063%;">**IdentityStoreId**</td><td data-col-size="sm" data-end="5888" data-start="5810" style="width: 62.6937%;">From IAM Identity Center</td></tr><tr data-end="5988" data-start="5889"><td data-col-size="sm" data-end="5910" data-start="5889" style="width: 37.3063%;">**SsoInstanceArn**</td><td data-col-size="sm" data-end="5988" data-start="5910" style="width: 62.6937%;">From IAM Identity Center</td></tr><tr data-end="6087" data-start="5989"><td data-col-size="sm" data-end="6010" data-start="5989" style="width: 37.3063%;">**AdminGroupName**</td><td data-col-size="sm" data-end="6087" data-start="6010" style="width: 62.6937%;">Default: `<Namespace>_SsAdminsGroup`</td></tr><tr data-end="6186" data-start="6088"><td data-col-size="sm" data-end="6111" data-start="6088" style="width: 37.3063%;">**ManagerGroupName**</td><td data-col-size="sm" data-end="6186" data-start="6111" style="width: 62.6937%;">Default: `<Namespace>_SsManagersGroup`</td></tr><tr data-end="6285" data-start="6187"><td data-col-size="sm" data-end="6208" data-start="6187" style="width: 37.3063%;">**UserGroupName**</td><td data-col-size="sm" data-end="6285" data-start="6208" style="width: 62.6937%;">Default: `<Namespace>_SsUsersGroup`</td></tr></tbody></table>

</div></div>---

#### About this Stack

**Purpose**

- Sets up **IAM Identity Center groups**, permissions and roles used by Sandbox Studio. You add users to these groups to grant role‑based access to the application.

**Where to deploy**

- **Organisation management account**, even if you have delegated IAM Identity Center administration to another account.

**What it creates**

- A set of IDC groups aligned to Sandbox Studio roles (for example: administrators, managers, end users).

**Validation checks**

- Groups appear in **IAM Identity Center**.
- Assigning a user to a group grants the expected application role after sign‑in.

**Tips**

- Add test users to each group and confirm the correct level of access in the UI before onboarding wider teams.

<div _ngcontent-ng-c3818350049="" class="markdown markdown-main-panel enable-updated-hr-color" dir="ltr" id="bkmrk--3"></div><div _ngcontent-ng-c3818350049="" class="markdown markdown-main-panel enable-updated-hr-color" dir="ltr" id="bkmrk--4"><div _ngcontent-ng-c3818350049="" class="markdown markdown-main-panel enable-updated-hr-color" dir="ltr" id="bkmrk--5"></div></div><div _ngcontent-ng-c3818350049="" class="markdown markdown-main-panel enable-updated-hr-color" dir="ltr" id="bkmrk--6"></div>

# Step 3: Deploy the Network stack

Install the Network CloudFormation stack in the **hub account**.

#### How to Install this Stack

1. Login to the AWS Management Console using the **Hub Account.**
2. Navigate to the **CloudFormation** page.
3. Click **Create Stack** and select **With new resources (standard)**.
4. For Template Source, select **Amazon S3 URL** and enter the CloudFormation Template URL shown below and click **Next**.
5. On the **Specify Stack** page, enter the stack name '**SandboxStudio-Network**' and use the parameters shown below.

---

#### CloudFormation Template URL

```
https://sandbox-studio-software-dist.s3.amazonaws.com/versions/<VERSION>/SandboxStudio-Network.template.json
```

For more information on how to find the latest version, [click here](https://docs.sandboxstudiosoftware.com/books/installation-guide/page/aws-cloudformation-templates "AWS CloudFormation templates").

---

#### Parameters

<table class="w-fit min-w-(--thread-content-width)" data-end="6285" data-start="5393" id="bkmrk-key-what-to-enter-na" style="width: 101.429%; height: 72px;"><thead data-end="5491" data-start="5393"><tr data-end="5491" data-start="5393"><th class="align-left" data-col-size="sm" data-end="5414" data-start="5393" style="width: 31.3592%;">**Key**</th><th class="align-left" data-col-size="sm" data-end="5491" data-start="5414" style="width: 68.6446%;">**What to enter**</th></tr></thead><tbody data-end="6285" data-start="5591"><tr data-end="5689" data-start="5591"><td data-col-size="sm" data-end="5612" data-start="5591" style="width: 31.3592%;">**Namespace**</td><td data-col-size="sm" data-end="5689" data-start="5612" style="width: 68.6446%;">Use the same namespace you used in step 1.</td></tr></tbody></table>

<div class="_tableContainer_sk2ct_1" id="bkmrk--2"><div class="_tableWrapper_sk2ct_13 group flex w-fit flex-col-reverse" tabindex="-1"></div></div>---

#### About this Stack

**Purpose**

- Creates the **VPC** foundation required by the application.
- Provides **private subnets** for the database and **private subnets with egress** for Lambda functions that require outbound access.

**Where to deploy**

- **Hub account**.

**What it creates**

- One VPC with multiple subnets (at minimum: private subnets for RDS and for VPC‑attached Lambdas).
- Route configuration to allow **egress** from private subnets (for example, via NAT or suitable endpoints).
- **VPC endpoints** for AWS services that support private routing.
- **Internet Gateway** and **NAT Gateway** for AWS services that do not support private routing.

**Validation checks**

- VPC and subnets are visible in the **VPC** console.
- Private subnets have no direct internet ingress and can reach required AWS endpoints for the application.

**Tips**

- Adjust VPC after installation to suit your needs such as routing through enterprise firewalls if needed.

<div _ngcontent-ng-c3818350049="" class="markdown markdown-main-panel enable-updated-hr-color" dir="ltr" id="bkmrk--4"><div _ngcontent-ng-c3818350049="" class="markdown markdown-main-panel enable-updated-hr-color" dir="ltr" id="bkmrk--5"></div></div><div _ngcontent-ng-c3818350049="" class="markdown markdown-main-panel enable-updated-hr-color" dir="ltr" id="bkmrk--6"></div>

# Step 4: Deploy the Data stack

Install the Data CloudFormation stack in the **hub account**.

#### How to Install this Stack

1. Login to the AWS Management Console using the **Organisation Management Account.**
2. Navigate to the **CloudFormation** page.
3. Click **Create Stack** and select **With new resources (standard)**.
4. For Template Source, select **Amazon S3 URL** and enter the CloudFormation Template URL shown below and click **Next**.
5. On the **Specify Stack** page, enter the stack name '**SandboxStudio-Data**' and use the parameters shown below.

---

#### CloudFormation Template URL

```
https://sandbox-studio-software-dist.s3.amazonaws.com/versions/<VERSION>/SandboxStudio-Data.template.json
```

For more information on how to find the latest version, [click here](https://docs.sandboxstudiosoftware.com/books/installation-guide/page/aws-cloudformation-templates "AWS CloudFormation templates").

---

#### Parameters

<div class="_tableContainer_sk2ct_1" id="bkmrk-key-what-to-enter-na"><div class="_tableWrapper_sk2ct_13 group flex w-fit flex-col-reverse" tabindex="-1"><table class="w-fit min-w-(--thread-content-width)" data-end="6285" data-start="5393" style="height: 55px; width: 100%;"><thead data-end="5491" data-start="5393"><tr data-end="5491" data-start="5393"><th class="align-left" data-col-size="sm" data-end="5414" data-start="5393" style="width: 27.0834%;">**Key**</th><th class="align-left" data-col-size="sm" data-end="5491" data-start="5414" style="width: 73.0358%;">**What to enter**</th></tr></thead><tbody data-end="6285" data-start="5591"><tr data-end="5689" data-start="5591"><td data-col-size="sm" data-end="5612" data-start="5591" style="width: 27.0834%;">**Namespace**</td><td data-col-size="sm" data-end="5689" data-start="5612" style="width: 73.0358%;">Use the same namespace you used in step 1.</td></tr></tbody></table>

</div></div>---

#### About this Stack

**Purpose**

- Deploys the **Amazon RDS** database that stores Sandbox Studio application data.
- Isolated from other stacks so you can upgrade application components without touching data.

**Where to deploy**

- **Hub account**.

**Dependencies**

- **Network** stack must be in place to supply VPC and subnets for the database.

**Validation checks**

- RDS instance/cluster appears in the **RDS** console and is placed in the **private database subnets**.
- Security groups allow required access from application Lambdas.

**Tips**

- Define and test backup/restore procedures appropriate to your organisation.

<div _ngcontent-ng-c3818350049="" class="markdown markdown-main-panel enable-updated-hr-color" dir="ltr" id="bkmrk--3"><div _ngcontent-ng-c3818350049="" class="markdown markdown-main-panel enable-updated-hr-color" dir="ltr" id="bkmrk--4"></div></div><div _ngcontent-ng-c3818350049="" class="markdown markdown-main-panel enable-updated-hr-color" dir="ltr" id="bkmrk--5"></div>

# Step 5: Deploy the Compute stack

Install the Compute CloudFormation stack in the **hub account**.

#### How to Install this Stack

1. Login to the AWS Management Console using the **Hub Account.**
2. Navigate to the **CloudFormation** page.
3. Click **Create Stack** and select **With new resources (standard)**.
4. For Template Source, select **Amazon S3 URL** and enter the CloudFormation Template URL shown below and click **Next**.
5. On the **Specify Stack** page, enter the stack name '**SandboxStudio-Compute**' and use the parameters shown below.

---

#### CloudFormation Template URL

```
https://sandbox-studio-software-dist.s3.amazonaws.com/versions/<VERSION>/SandboxStudio-Compute.template.json
```

For more information on how to find the latest version, [click here](https://docs.sandboxstudiosoftware.com/books/installation-guide/page/aws-cloudformation-templates "AWS CloudFormation templates").

---

#### Parameters

<table class="w-fit min-w-(--thread-content-width)" data-end="8251" data-start="7942" id="bkmrk-key-what-to-enter-na" style="height: 120px; width: 108.929%;"><thead data-end="8003" data-start="7942"><tr data-end="8003" data-start="7942"><th class="align-left" data-col-size="sm" data-end="7963" data-start="7942" style="width: 31.466%;">**Key**</th><th class="align-left" data-col-size="sm" data-end="8003" data-start="7963" style="width: 68.534%;">**What to enter**</th></tr></thead><tbody data-end="8251" data-start="8066"><tr data-end="8127" data-start="8066"><td data-col-size="sm" data-end="8087" data-start="8066" style="width: 31.466%;">**Namespace**</td><td data-col-size="sm" data-end="8127" data-start="8087" style="width: 68.534%;">Use the same namespace you used in step 1.</td></tr><tr data-end="8189" data-start="8128"><td data-col-size="sm" data-end="8149" data-start="8128" style="width: 31.466%;">**OrgMgtAccountId**</td><td data-col-size="sm" data-end="8189" data-start="8149" style="width: 68.534%;">12‑digit **management** account ID</td></tr><tr data-end="8251" data-start="8190"><td data-col-size="sm" data-end="8211" data-start="8190" style="width: 31.466%;">**IdcAccountId**</td><td data-col-size="sm" data-end="8251" data-start="8211" style="width: 68.534%;">12‑digit **management** account ID</td></tr></tbody></table>

<div class="_tableContainer_sk2ct_1" id="bkmrk--2"><div class="_tableWrapper_sk2ct_13 group flex w-fit flex-col-reverse" tabindex="-1">  
</div></div>---

#### About this Stack

**Purpose**

- Deploys the core backend components that respond to events and orchestrate workflows such as **new account setup** and **account cleanup**.

**Where to deploy**

- **Hub account**.

**What it creates**

- **Amazon EventBridge** rules.
- **AWS Lambda** functions that react to events and perform application logic.
- **Amazon SQS** queues to drive asynchronous processing.
- **AWS Step Functions** for multi‑step workflows.
- **AWS CodeBuild** projects used during setup/cleanup tasks.

**Dependencies**

- Requires **Network** (for VPC‑attached Lambdas) and **Data** (to read/write application state). If notifications are used, it may reference **SES** templates.

**Validation checks**

- EventBridge rules are enabled.
- Lambda functions deploy successfully and, where configured, attach to the VPC subnets.
- SQS queues and Step Functions state machines are present.

**Tips**

- Become familiar with logs/metrics produced by compute components in **Amazon CloudWatch** and monitor for errors.

<div _ngcontent-ng-c3818350049="" class="markdown markdown-main-panel enable-updated-hr-color" dir="ltr" id="bkmrk--4"><div _ngcontent-ng-c3818350049="" class="markdown markdown-main-panel enable-updated-hr-color" dir="ltr" id="bkmrk--5"></div></div><div _ngcontent-ng-c3818350049="" class="markdown markdown-main-panel enable-updated-hr-color" dir="ltr" id="bkmrk--6"></div><div _ngcontent-ng-c3818350049="" class="markdown markdown-main-panel enable-updated-hr-color" dir="ltr" id="bkmrk--7"><div _ngcontent-ng-c3818350049="" class="markdown markdown-main-panel enable-updated-hr-color" dir="ltr" id="bkmrk--8"></div></div><div _ngcontent-ng-c3818350049="" class="markdown markdown-main-panel enable-updated-hr-color" dir="ltr" id="bkmrk--9"></div>

# Step 6: Deploy the API stack

Install the API CloudFormation stack in the **hub account**.

#### How to Install this Stack

1. Login to the AWS Management Console using the **Hub Account.**
2. Navigate to the **CloudFormation** page.
3. Click **Create Stack** and select **With new resources (standard)**.
4. For Template Source, select **Amazon S3 URL** and enter the CloudFormation Template URL shown below and click **Next**.
5. On the **Specify Stack** page, enter the stack name '**SandboxStudio-API**' and use the parameters shown below.

---

#### CloudFormation Template URL

```
https://sandbox-studio-software-dist.s3.amazonaws.com/versions/<VERSION>/SandboxStudio-API.template.json
```

For more information on how to find the latest version, [click here](https://docs.sandboxstudiosoftware.com/books/installation-guide/page/aws-cloudformation-templates "AWS CloudFormation templates").

---

#### Parameters

<div class="_tableContainer_sk2ct_1" id="bkmrk--2"><div class="_tableWrapper_sk2ct_13 group flex w-fit flex-col-reverse" tabindex="-1">  
</div></div><table id="bkmrk-key-what-to-enter-na" style="width: 100.238%; height: 148.984px;"><thead><tr style="height: 29.7969px;"><th class="align-left" style="width: 23.6152%; height: 29.7969px;">**Key**</th><th class="align-left" style="width: 76.3848%; height: 29.7969px;">**What to enter**</th></tr></thead><tbody><tr style="height: 29.7969px;"><td style="width: 23.6152%; height: 29.7969px;">**Namespace**</td><td style="width: 76.3848%; height: 29.7969px;">Use the same namespace you used in step 1.</td></tr><tr style="height: 29.7969px;"><td style="width: 23.6152%; height: 29.7969px;">**OrgMgtAccountId**</td><td style="width: 76.3848%; height: 29.7969px;">12‑digit **management** account ID</td></tr><tr style="height: 29.7969px;"><td style="width: 23.6152%; height: 29.7969px;">**IdcAccountId**</td><td style="width: 76.3848%; height: 29.7969px;">12‑digit **management** account ID</td></tr><tr style="height: 29.7969px;"><td style="width: 23.6152%; height: 29.7969px;">**AllowListedIPRanges**</td><td style="width: 76.3848%; height: 29.7969px;">Comma separated CIDRs allowed to call the API (default “allow all”): `0.0.0.0/1,128.0.0.0/1`</td></tr></tbody></table>

---

#### About this Stack

**Purpose**

- Publishes the application’s **public API** and **front‑end web experience**.

**Where to deploy**

- **Hub account**.

**What it creates**

- **Amazon API Gateway** with Lambda integrations that expose Sandbox Studio APIs.
- The **end‑user web application** for accessing Sandbox Studio.

**Dependencies**

- **Compute** (backend logic) and **Data** (application database) must exist.

**Validation checks**

- API endpoints return healthy responses.
- The web UI loads and users can sign in via **IAM Identity Center** groups created by the **IDC** stack.

**Tips**

- Capture the API base URL and distribute it to administrators and managers.

<div _ngcontent-ng-c3818350049="" class="markdown markdown-main-panel enable-updated-hr-color" dir="ltr" id="bkmrk--4"><div _ngcontent-ng-c3818350049="" class="markdown markdown-main-panel enable-updated-hr-color" dir="ltr" id="bkmrk--5"></div></div><div _ngcontent-ng-c3818350049="" class="markdown markdown-main-panel enable-updated-hr-color" dir="ltr" id="bkmrk--6"></div>